Saturday, June 6, 2009

NEW: personalized metalstamping!


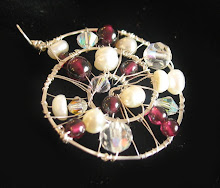
I'm excited to offer a new line of hand-stamped personalized jewelry! Your name or message on stainless steel washers, with your choice of beads and your length of chain. Stainless steel or sterling silver!

Monday, May 4, 2009

Way to Upcycle! I Heart NY Tshirt Bag

I came across this great tutorial on the NewNew blog and wanted to share it! The NewNew is the NYC etsy team. Check out some Etsians at the Handmade Cavalcade this weekend!


NYC T-Shirt Bag


Reusable bags are all the rage now—and I hope this trend lasts.
Here's a little tutorial that will show you how to turn an iconic NYC T-shirt into a handy little reusuable shopping bag with a sophisticated textured touch. I love looking through this book and I always jump at the opportunity to try her techniques.
So here goes!

You will need:
• NYC T-shirt
• A scrap of red fabric (knit or woven) approximately 5"x9" (the bigger the fabric, the more texture you will get)
• A scrap of interfacing the size of the heart on the T-shirt.
• A needle & thread
• Pins
• An Embroidery hoop
• Access to an iron and a sewing machine


Begin by laying your T-shirt out on your work surface. (And yes, I'm in New York, so the floor is frequently my work surface.) Cut off the sleeves (including the seams) of the T-shirt. Fold the shirt down the middle (lengthwise) and cut off the collar. This will leave you with a sleeveless V-neck T-shirt. Lay the shirt flat again and cut off the bottom 5". (These scraps make excellent dust rags!) Now on to the applique part.

Iron the interfacing over the heart on the wrong side of the T-shirt. Cut your red fabric into a very rough heart shape. It should be considerably larger than the heart on the shirt. Turn the edge of red fabric under approximately 1/4" (iron, if you wish), center it on the heart and pin it down in four places (top/bottom/sides). Center the heart in your embroidery hoop, thread your needle and get ready to sew. Applique the red fabric shape around the edge of the heart using a short running stitch. Because the red shape is bigger than the heart, you will have to gather it slightly as you go by taking bigger stitches through the red shape and shorter stitches along the edge of the heart. You will have a funny puffy shower cap/mushroom shape attached to your shirt when you are finished.

Now the furrowing begins! Start from the back and bring your needle up through the center of the heart and the center of the red shape. Pull the thread taut and then push your needle back down in almost exactly the same spot. You have now tacked down the center of the puffy cap. Move to another area approximately 1" away and repeat the process of sewing up through the shirt and the fabric shape and then down in the same space. Again, move to another area of the heart approximately 1" away and make another stitch. Keep in mind that you are trying to go up through two layers of fabric and then back down through two layers. You will continue to do this across the whole surface of the heart, creating little wrinkles and furrows as you go. I would recommend keeping your stitches far apart initially to help keep the big furrows relatively evenly spaced then work within these smaller sections. Continue to make stitches randomly around the heart until you are happy with the furrowed texture. The back of the heart will be a glorious mess of zig-zagging stitches.
There's no real right or wrong way to. The beauty is in the irregularity of the wrinkles.

Next, turn your shirt inside out and lay it flat again. Pin and sew the bottom edge together. Open the seam flat (and facing up). Measure 3" from each corner of the seam and mark a line that is perpendicular to that bottom seam. Pin and sew along these lines. Trim the seams and turn your new bag right side out.

If you want to make your bag even fancier, you can A) hem the handle edges (doable with a sewing machine & super-easy with a serger), B) applique another heart on the back to cover your stitches, C) cut a cardboard rectangle from an old box to create a flat bottom for your bag.


Now I'm off to the farmer's market to pick up my last minute Thanksgiving supplies!
Tanya
www.luckx4.etsy.com

aaaaaaaaand we're back!


Alexlady Designs is now offering made-to-order Sterling silver rings! More designs to come.

Follow this link for a printable ring-sizer. The beauty of this ring is that, while it's not entirely adjustable, it's very forgiving. Please specify if you'd prefer a toe ring, and I'll adjust the spirals accordingly.

Monday, March 2, 2009

Online Drama-rama

I'm torn about this blog, because part of me screams "potential buyers read this thing!! Be careful of what you say!" But then, I started this blog with the intention of chronicling my experiences in starting a jewelry business. Therefore, I think it's only fair to include experiences that aren't always so rosy. Also, I need to complain a little.


I recently started posting more frequently in the Etsy forums because my "came-from" stats tell me that forum-goers are very likely to visit the blogs and shops of other posters. I had been posting a couple of topics a day, some not very interesting. In fact, I thought that this particular topic would get two or three comments, and then get buried (like a lot of my other posts), but instead, i started a firestorm.

The Post:

"Lately I've been noticing that, when I'm shopping, if the shop has poorly written descriptions that I'll actually skip looking at the descriptions at all, and sometimes i'll exit the shop and not come back.
Am I anal? Does anyone else find themselves cringing at and backing away from poor grammar and self-deprecating remarks in item summaries?"


Okay, okay. This post was out of character for me, I'm usually very positive and supportive, but i had just read an item description in an Etsy store that went something like:

"Here is a necklace I made that looks good with anything LOL!!! Sorry the foto is blurry but I wanted to post it ASAP I promise it is really nice even though i can't take pics worth a $##&&. Show me some luv!"

i completely made that up, but this is representative of the descriptions that make me click away from a store. I had run into a bunch of listings like this while I was browsing and it's like sandpaper on my butt.

This thread, which started as something silly that stuck in my craw, produced 675 comments. Many of these comments were arguments over spelling, which i had never addressed in the original post. Then there were replies regarding ESL, dyslexia, cystic fibrosis, brain damage, judgement, bias, minding one's own business, harrassment, drunkenness, being lazy, being unkind, and being snotty.

I wound up seriously regretting having written this post.

Interestingly enough, there were plenty of responses from folks that agreed with me, who I have to assume are also not elitist xenophobic bullies with an itch to pick on artists with learning disabilities. I'm hoping that they are only shoppers like me, who appreciate a well-written description of a beautiful item. Alas, now I'm super-paranoid that people will see my shop name in the future, and think i'm a big jerk. This is probably true for the five or six people that got really insulted by my post, but hopefully not for most Etsians. I'm sure it'll all blow over and most folks won't remember it happened at all. But for now, alexlady won't be starting any topics in the forums. Jeez.

Friday, February 27, 2009

New Item: Jewelry tree!


I've had this idea be-bopping around in my mind for quite some time, so to actually see it in action is totally exciting!

This jewelry tree is easily and safely mounted to your wall with two little nails, which are included. This particular model has 18 hooks for necklaces and room for over 18 pairs of earrings! Your tree will be similar, but not identical due to the one-of-a-kind nature of this handmade item. What a snazzy way to keep your jewels organized, yes-no?

Wednesday, February 25, 2009

"Not your Grandmother's Pearls"

Yeah, that's right.

Those are indeed Sterling and Pearl panties.

Thank you, Amberraindesigns!

Tuesday, February 17, 2009

Don't pay someone to obtain your Tax I.D.! EIN info below...

When i filed to become an LLC, I hired a company to do it for me... but the services were *FREE* for a week, so all I paid were the fees! (I am thrifty.) One of the add-ons was that the company would apply for and obtain your tax I.D. number for you, which enables you to purchase wholesale and without taxes.

This is the biggest rip! The link to the government site is right here, you can do it online and it takes less than five minutes. You're assigned your number right away and can download the official letter in PDF to print right away.

https://sa2.www4.irs.gov/modiein/individual/index.jsp